Are you looking to enhance your WordPress website with advanced AI capabilities? Look no further than the Aiify plugin! In this step-by-step guide, we’ll walk you through the process of installing and activating the Aiify plugin on your WordPress site.
Step 1: Login to Your WordPress Dashboard
The first step is to download the Aiify plugin to your computer. Log in to the admin area of your WordPress website and In the dashboard, look for the “Plugins” tab on the left-hand sidebar and click on it.
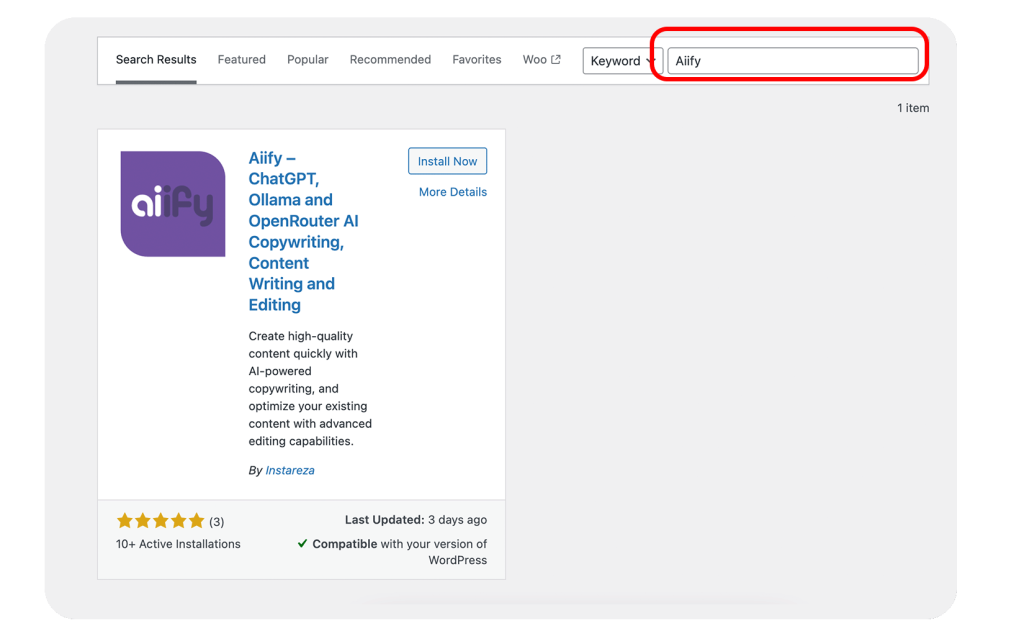
Step 2: Install the Aiify Plugin & Activate
Once in the Plugins section, click the “Add New” button and in the search bar, type “Aiify” and press Enter. If the plugin is available, it should appear in the search results. Locate the Aiify plugin in the search results and click the “Install Now” button. After installation, a “Activate” button will appear. Click on it to activate the Aiify plugin.
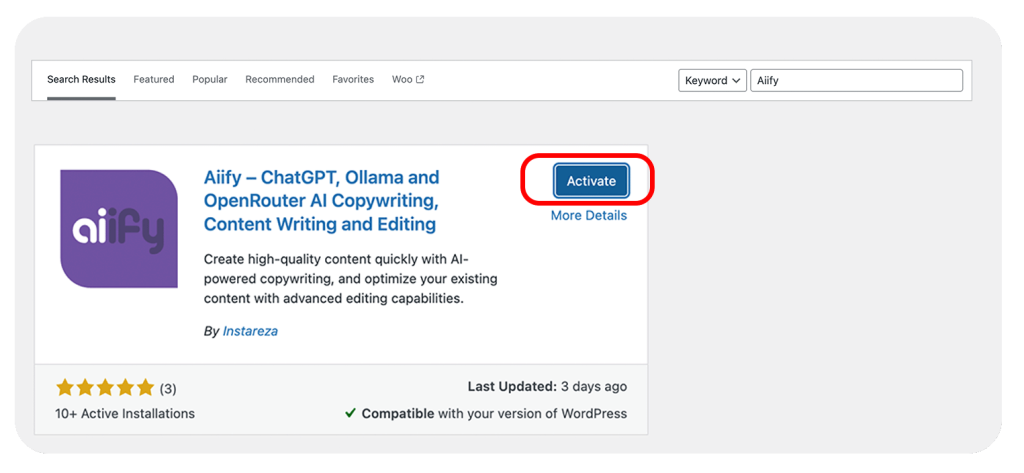
Congratulations! You have successfully installed and Activated the Aiify plugin on your WordPress site. Enjoy the benefits of harnessing the power of AI to enhance your website’s functionality and user experience.
Step 3: Configure the Aiify Plugin
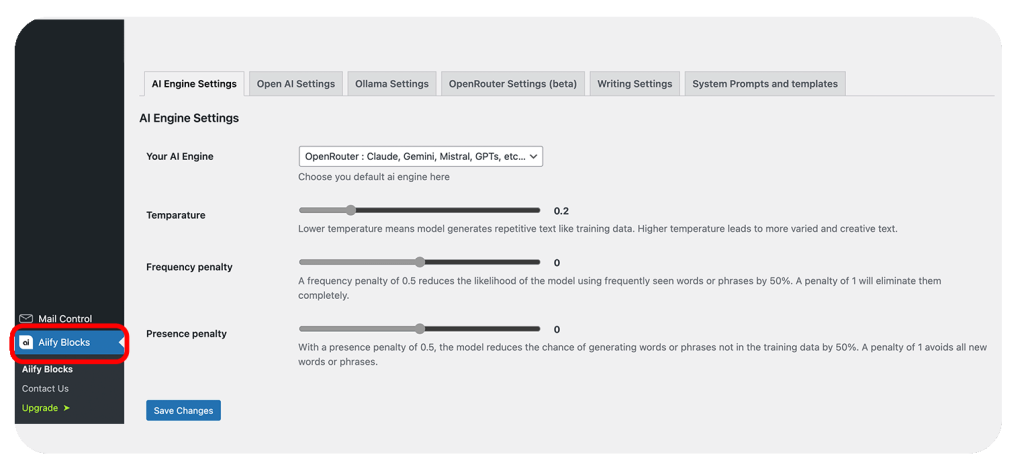
Some plugins have settings that you may need to configure. Look for a Aiify Blocks section in your dashboard
Step 4: Test the Aiify Plugin
Now that the Aiify plugin is installed and configured, it’s time to test it out. Create a new post or page on your WordPress site and look for the Aiify integration options. These options may vary depending on the capabilities provided by Aiify.
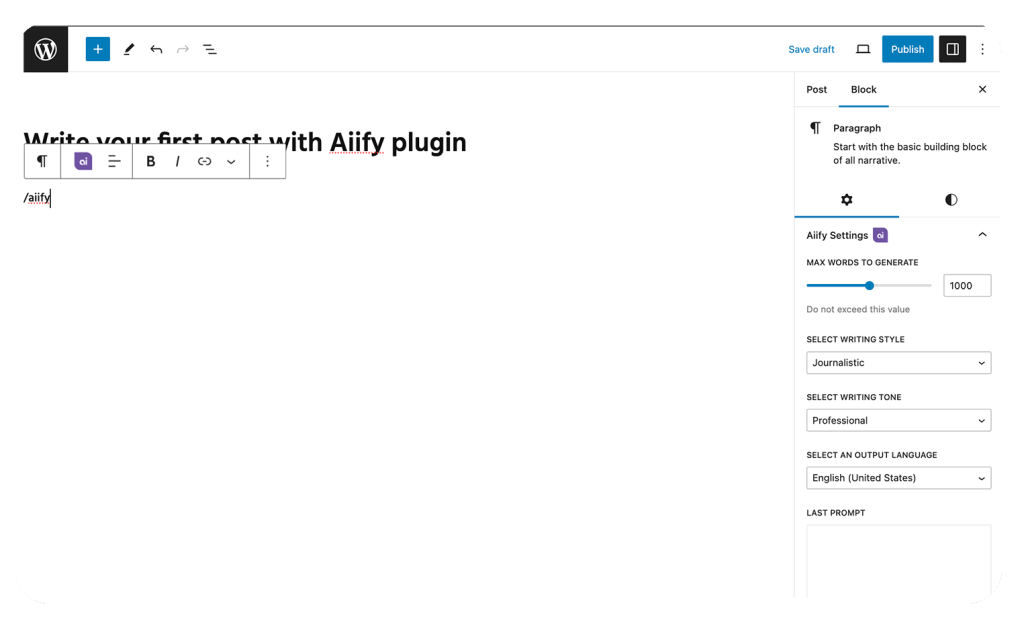
Experiment with the various features and options available, such as content generation, language translation, sentiment analysis, or any other AI-powered functionality Aiify offers. Make sure to thoroughly test each feature to ensure they are working as expected.
Remember to regularly update the Aiify plugin to access the latest features and security enhancements. If you encounter any issues during the installation or usage of the plugin, refer to Aiify’s documentation or seek support from our official channels.
I hope this guide has been helpful to you. Happy AI-powered WordPress-ing!


